Recover Office Documents on Mac or Windows is the fastest.
Recover Office Documents on Mac or Windows

Word, PowerPoint and Excel are known as Microsoft office documents which can help people write articles, take notes, make forms and slides and do many other things. In a word, they are really practical office tools thar are used by many people frequently to make their job easier and effective. So, many important working documents are saved in the format of Word, PowerPoint and Excel. And due to most of office documents do not have large size, you may not have a good habit to backup them.
But data loss may happen to you because of various reasons, like mistaken deletion, partition format, system crash and others. Once the office documents are lost, it will be a really serious problem. Because the precious working data are gone and it is like all the job you have done before are wasted and have no repay. What’s more? Your boss may get mad with you for the reason that the working documents are lost. If this situation comes to you unfortunately, do not worry. AppleXsoft File Recovery for Mac and AppleXsoft Data Recovery Professional will find your lost office documents back easily so that your efforts will not wasted.
Now I will show you how to recover office documents on Mac with AppleXsoft File Recovery for Mac in details. ( If you use Windows, you can use AppleXsoft Data Recovery Professional with similar steps.)
Before getting started, you need to connect your Linux drive to a computer which uses Mac operating system. (It is just like to use your Linux drive as an external hard drive.) Then please install Applexsoft File Recovery for Mac on your computer.
Step 1
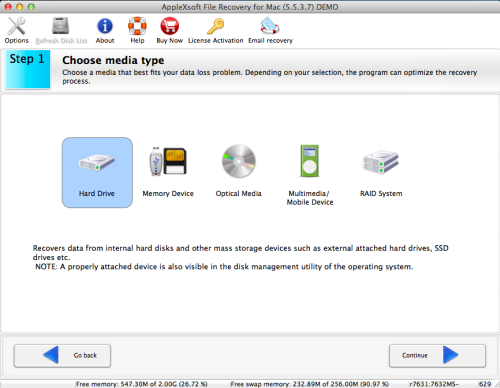
After running AppleXsoft Data Recovery for Mac, Choose “Hard Drive” as the media type in order to recover lost files in your Mac computer. If you want to recover documents you used to store in your portable devices ( USB, external hard drive, SD card or others), you can choose “memory devices” here. Then Click “Continue”.
 Step 2
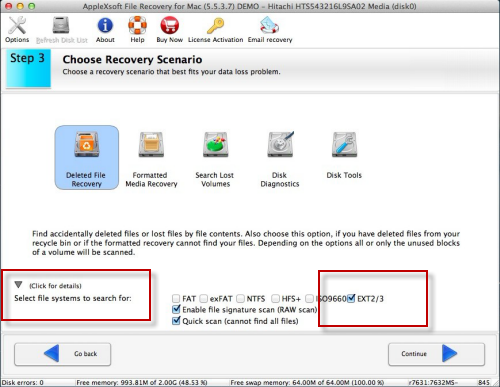
In this interface, you need to choose the partition or volume where your lost documents stored before. And then continue to next step and choose recovery scenario due to different data loss reasons. You can choose “deleted file recovery”or “formatted file recovery” in this step according to your situation. Then click “Continue” to next.
 Step 3 - Start to Scan
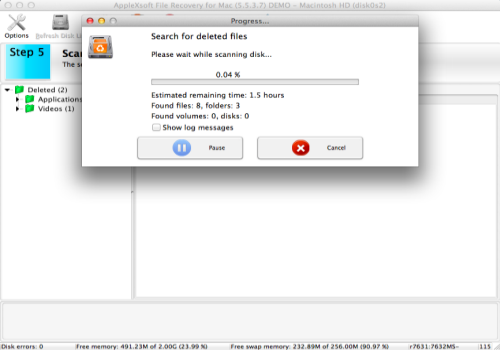
Once you Click “Continue” button, the software will scan the volume automatically. The whole scan process need to take some time and please do not use your computer while scanning.
 Step 4 Choose Documents and Preview
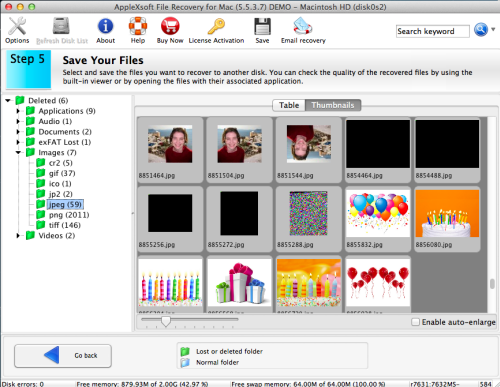
When the scan is completed, all recoverable files will show in categories and you can see the categories listed in the left. Please click “deleted”- “documents”, then you will see your office documents files.
 Step 5 - Save
Select the office documents you want to recover and click “Save “ button in the toolbar. Then you will enter the following screen, choose the destination you want and save them to recover. Please remember that do not choose the partitions where you lost them as the destination for saving, it may has risk to overwrite and led to failure.
Now you can go to the folder you have chosen before to check your offices documents. I am sure that they must will be there and can be opened without problem. Click the following link to download our free trial version to try. And you will find its great function and you hard work won’t be wasted!
Trial it to start recovering your office documents from Mac OR Windows!

Related Questions
 Word, PowerPoint and Excel are known as Microsoft office documents which can help people write articles, take notes, make forms and slides and do many other things. In a word, they are really practical office tools thar are used by many people frequently to make their job easier and effective. So, many important working documents are saved in the format of Word, PowerPoint and Excel. And due to most of office documents do not have large size, you may not have a good habit to backup them.


